Set Up Google Search Console
Follow the steps below. Every step ends with a Done when line — do not move on until that condition is true. If you get stuck, the support table below has Nolan's contact info.
| Who | How to reach them | What to say |
|---|---|---|
| Nolan (FunkPd) | +1 431 813 2402 contact@funkpd.com |
Email with a screenshot of what you are seeing and which step you are stuck on. Email is the best way to reach Nolan. |
| ChatGPT | chat.openai.com | Copy and paste any step from this page and ask it to explain in simpler terms. |
Step 1 — Open Google Search Console and Create a Property
A "property" is just Google's word for your website inside their tool. You are creating a record that says "this domain belongs to me."
-
Go to search.google.com/search-console and sign in with your Google account.
Use the same Google account you plan to use for everything — email, Google Business Profile, the works. Do not create a new account for this.
You are signed in and can see the Google Search Console dashboard.
-
Click
Add property, choose theDomainoption, and type in your main website address — for exampleyourdomain.com— then clickContinue.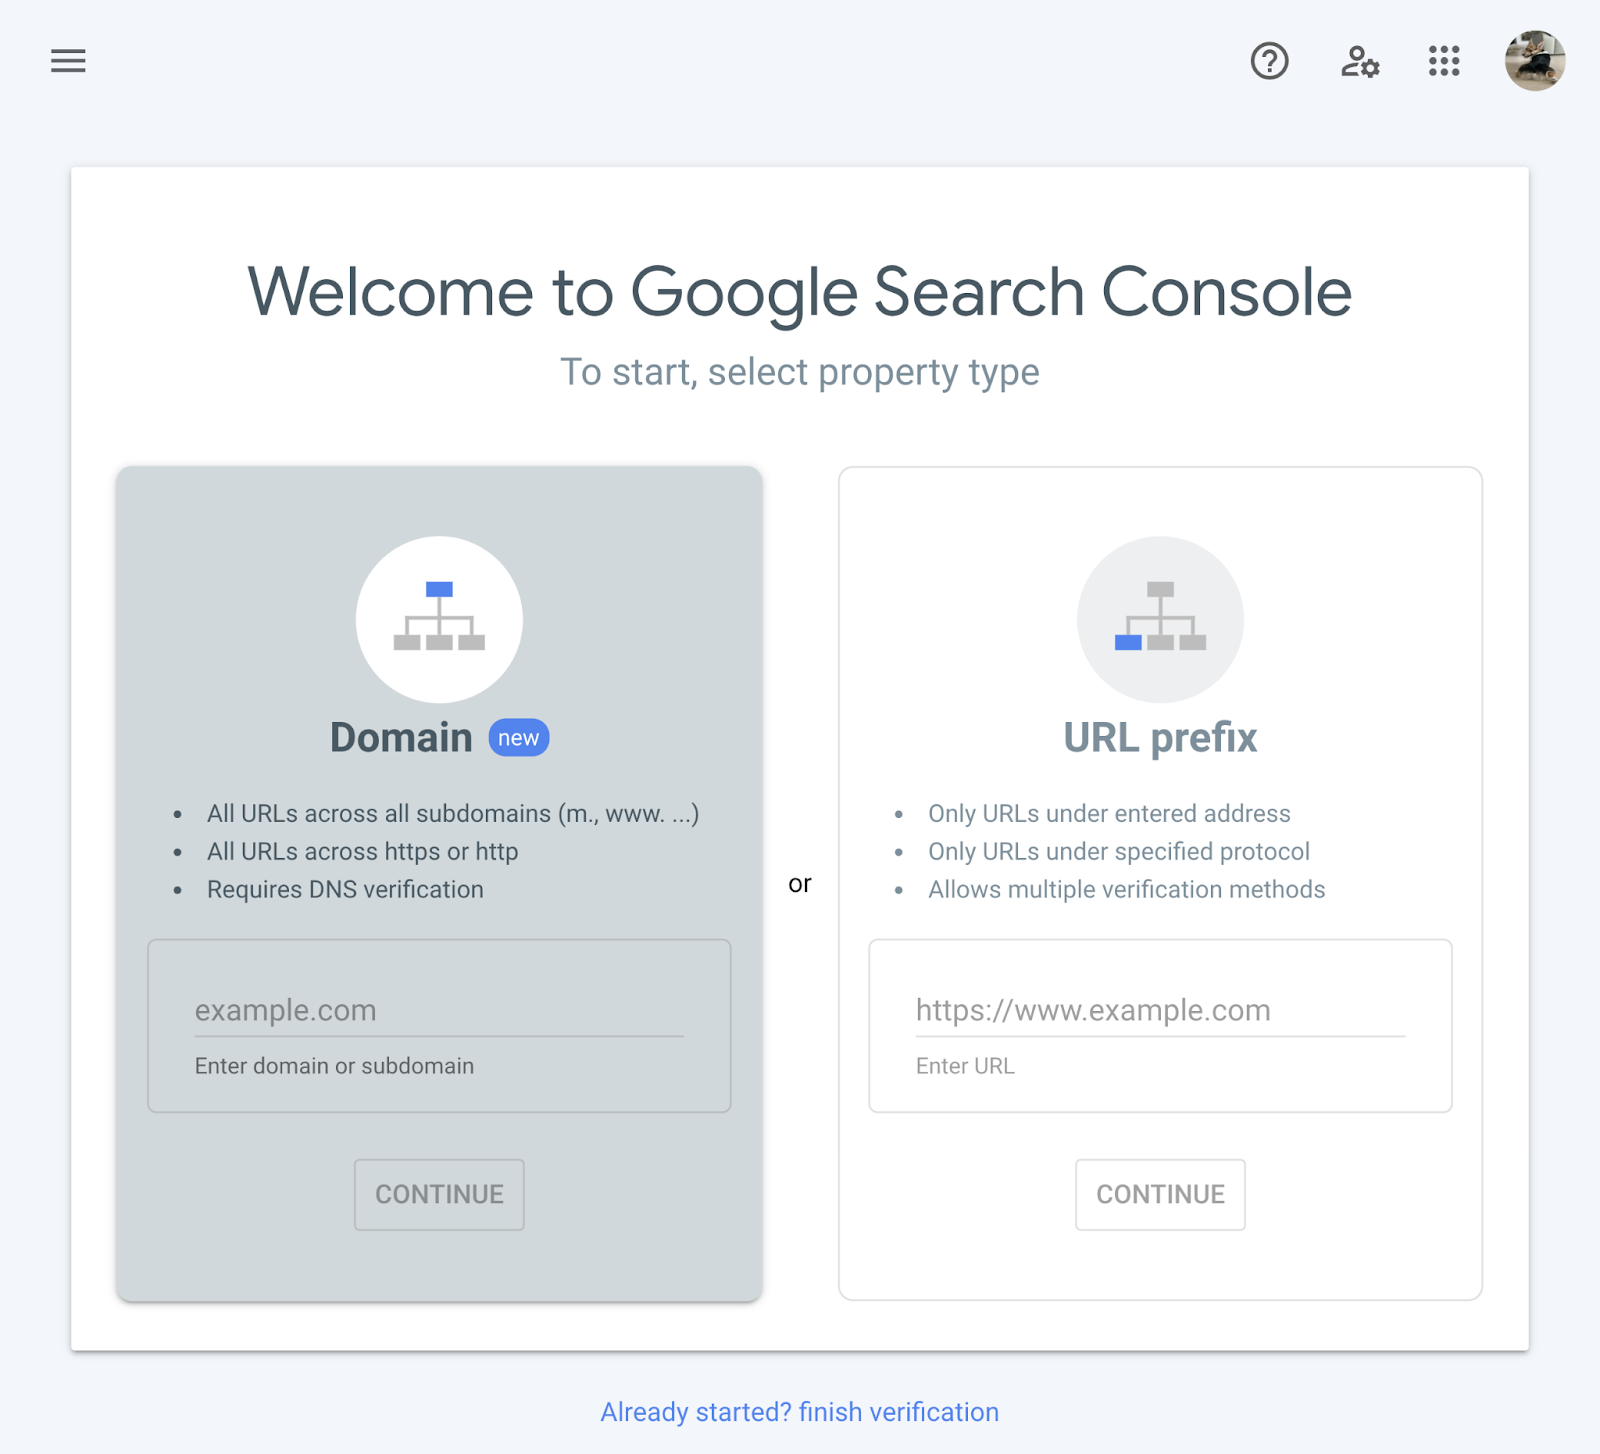
Choose Domain, not URL prefix. Domain covers your entire site including www, non-www, http, and https all at once — URL prefix only covers one version. Google shows a screen with a TXT record value to copy.
Step 2 — Verify That You Own the Domain
Google needs proof that you actually own your website before it will share data with you. The way it works: Google gives you a short code, Nolan pastes it into the settings for your domain, and then you tell Google to go check. That is the whole thing.
-
On the verification screen, copy the full code value and send it to Nolan.
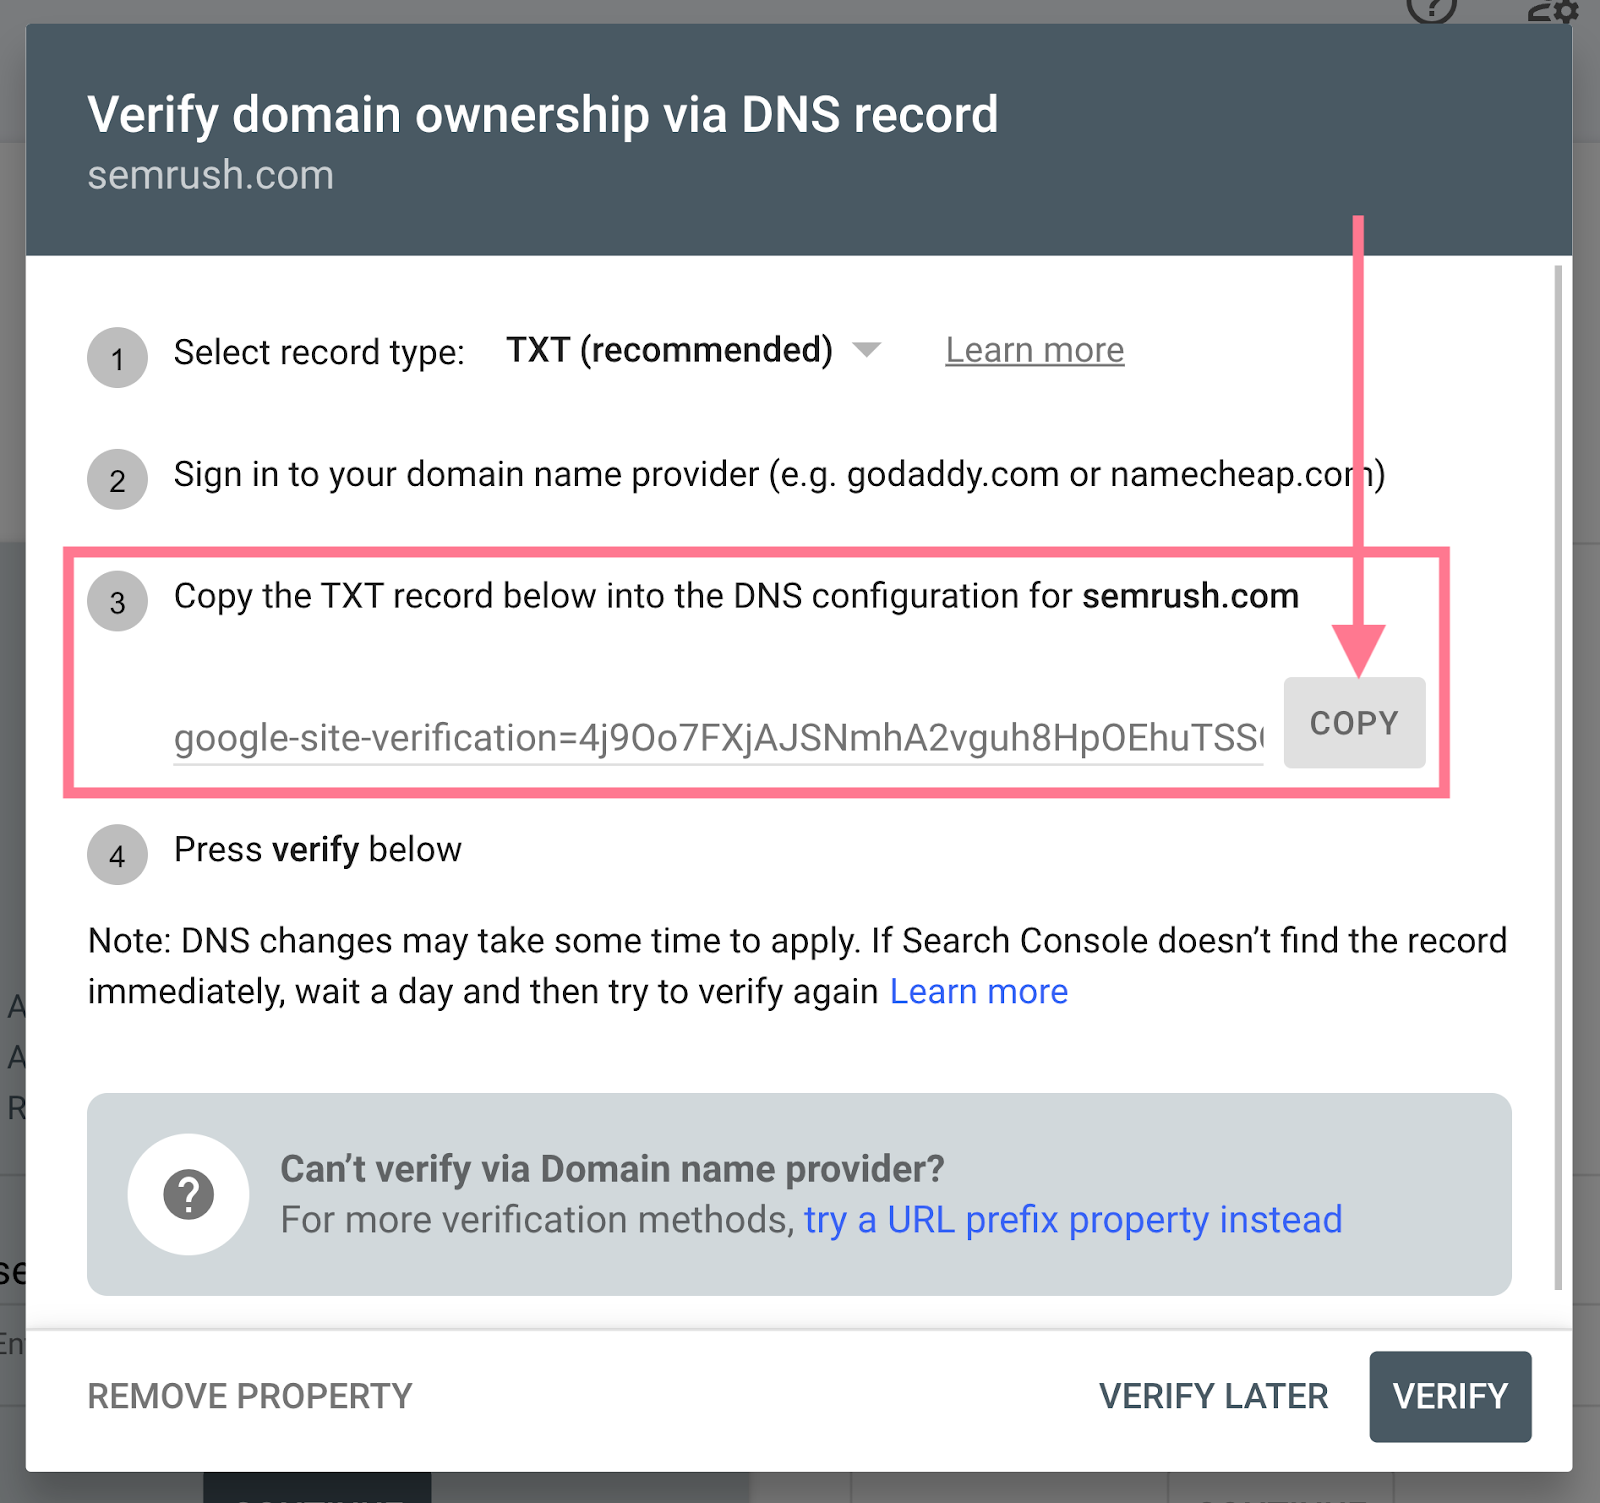
Click the copy icon next to the value — do not retype it by hand. Even one wrong character will cause verification to fail. Send it to Nolan by text or email. Text or email Nolan this message — paste the code at the end:
"Hey Nolan, I am on the Google Search Console verification step. Here is the code it gave me: [paste here]. Can you add this for me?"
Nolan replies and confirms he is on it.
-
Wait for Nolan to say it is done, then go back to Google Search Console and click
Verify.Do not click Verify until Nolan gives you the go-ahead — the code needs to be live on your domain first or it will fail. If you click too early and it fails, nothing breaks — just wait and try again later.
Google Search Console shows a green confirmation that you are a verified owner.
If Nolan says he cannot add the code and you need to do it yourself — read this first
The code needs to be added to the place where your domain is managed. Think of it like updating a contact in your phone — you just need to log in to the right place and paste one thing in. Follow these steps and you will get through it.
Step 1 — Find out who manages your domain.
Check your email for a receipt or confirmation from when you first set up your website. The company that sent it is likely where your domain is managed. Common ones: GoDaddy, Namecheap, Google Domains, Cloudflare, or your web host. Not sure? Ask Nolan — he can usually figure it out from your domain name alone.
Step 2 — Log in to that company's website.
Use your account login for that company. If you have forgotten the password, use their "Forgot password" option — do not create a new account.
Step 3 — Find the DNS settings.
Once logged in, look for your domain name in the account. There is usually a section called DNS, DNS Records, DNS Management, or Advanced DNS. It might be inside a section called "Domain", "My Domains", or "Settings". Click into it.
Step 4 — Add a new record.
Look for a button that says Add Record, Add DNS Record, or + Add. Click it. A form will appear. Fill it in like this:
- Type: choose
TXTfrom the dropdown - Name or Host: type
@(just the @ symbol — this tells it to apply to your main domain) - Value, Content, or Data: paste the full code from Google exactly as copied
- TTL: leave it on whatever the default is
Save the record. Different providers call the save button different things — "Save", "Add Record", "Confirm", or just a checkmark.
Step 5 — Wait, then click Verify.
After saving, wait at least 15 minutes before going back to Google Search Console and clicking Verify. Some providers take longer — if it fails after 15 minutes, wait another hour and try again.
If anything on your provider's screens looks different from what is described here, take a screenshot of what you are seeing and email it to contact@funkpd.com — do not guess.
Step 3 — Submit Your Sitemap
A sitemap is a file on your website that lists all your pages in one place. Submitting it tells Google exactly where to look so it can find and index your pages faster. You are not creating anything — the sitemap file already exists on your site, you are just pointing Google to it.
-
In the left sidebar, click
Sitemaps.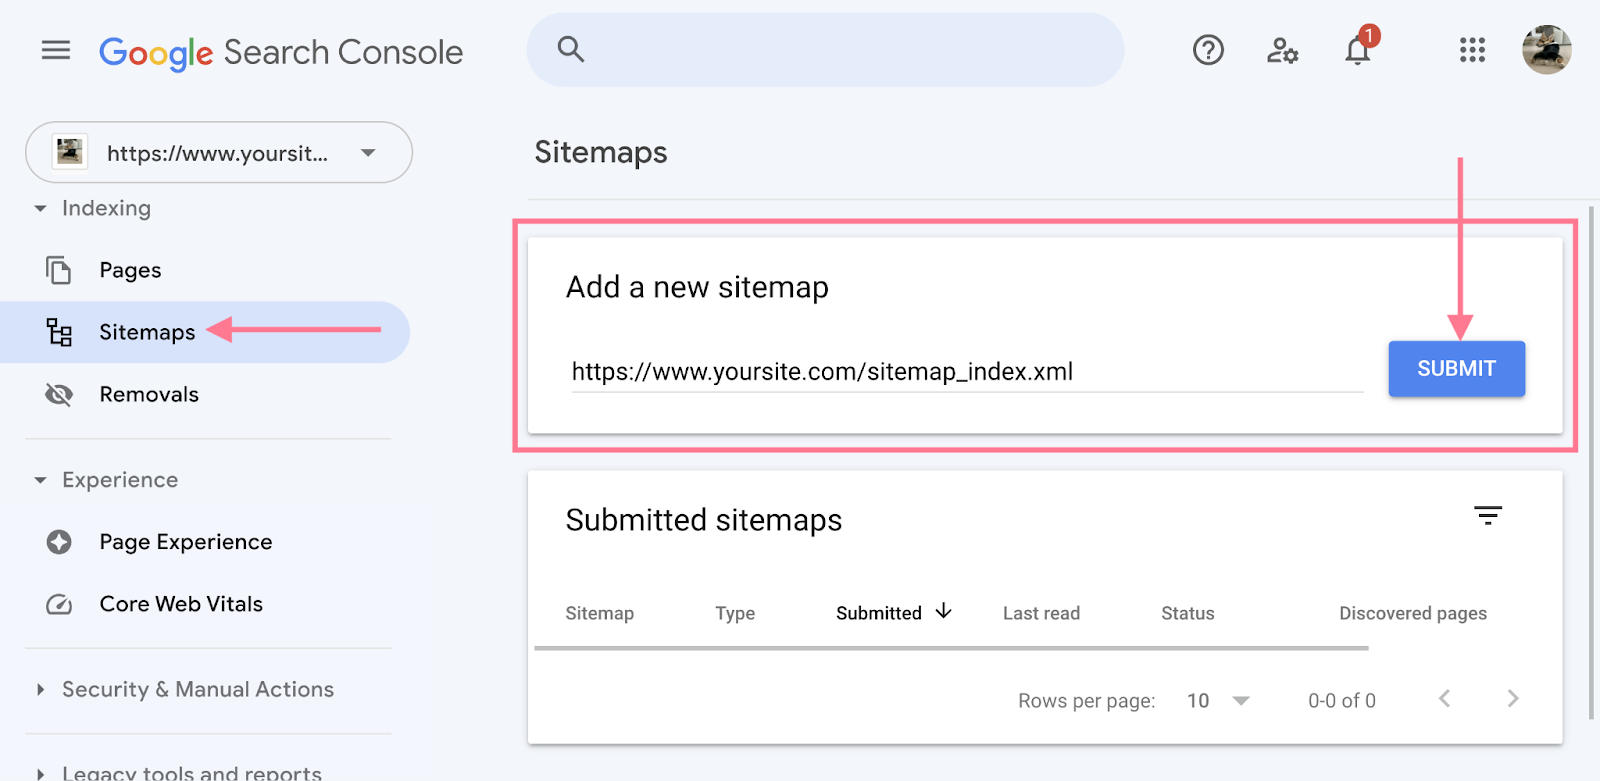
The Sitemaps option is in the left navigation panel under the Indexing section. You can see the "Add a new sitemap" field.
-
In the sitemap field, copy and paste the text below exactly as shown, then click
Submit.sitemap_index.xml
Your domain is already filled in on the left side of the field — paste only the filename on the right side. For most WordPress sites, sitemap_index.xmlis correct. If Nolan gave you a different sitemap URL, use that instead.Google shows a success message and the sitemap appears in the list below.
-
Check the submitted sitemaps table to confirm the status shows success.
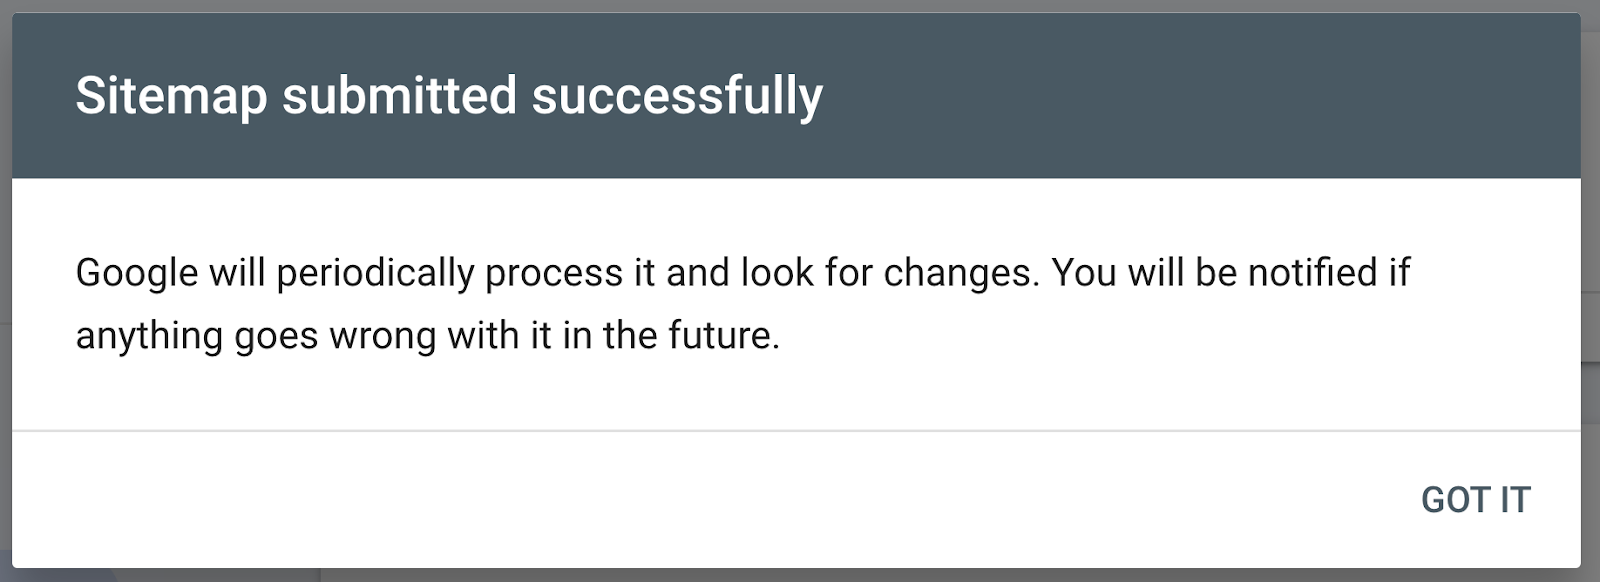
A "Success" status means Google accepted the sitemap and will start processing it. It may take a day or two before you see page counts update. 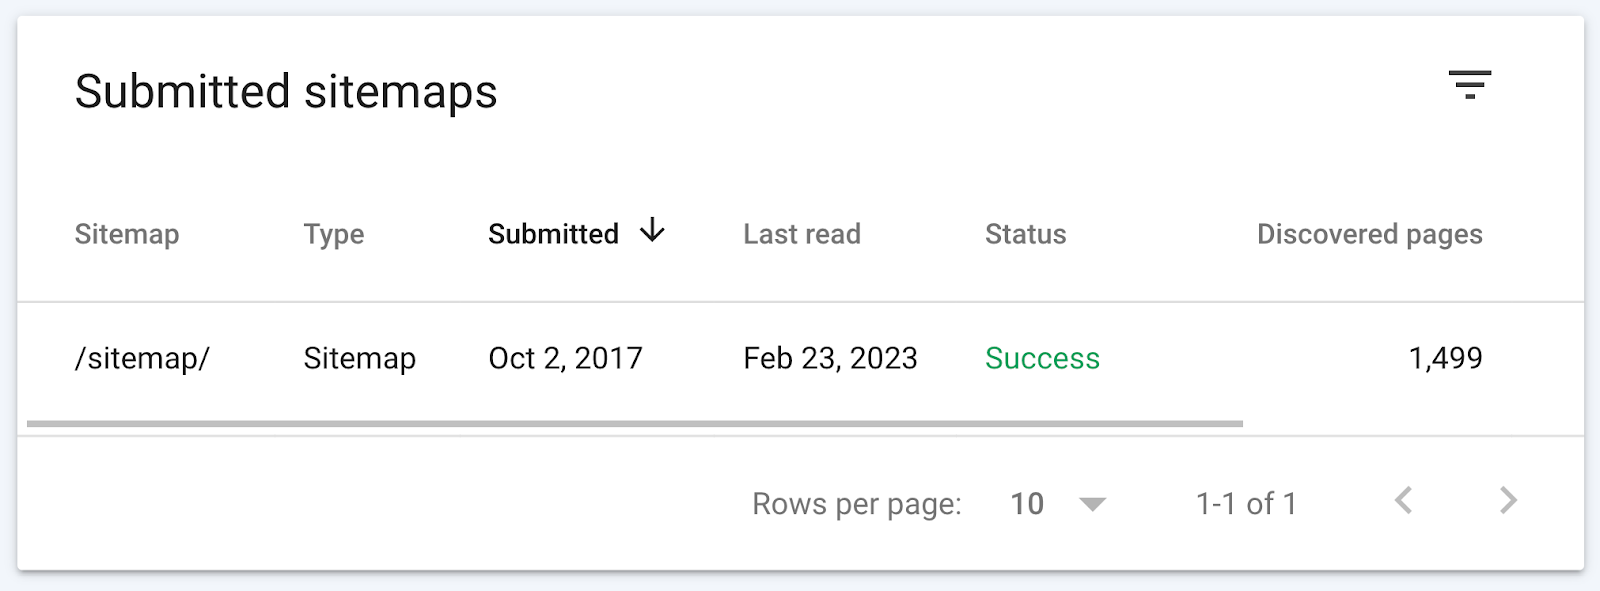
The table shows when Google last read the sitemap and how many pages it found. You can come back here later to confirm everything is processing normally. The sitemap shows a "Success" status in the submitted sitemaps table.
sitemap_index.xml, try sitemap.xml instead. If that also fails, ask Nolan for the correct sitemap URL — he can find it in the Yoast SEO plugin settings on your WordPress site.
Step 4 — Give Nolan Owner Access
Adding Nolan as an owner means he can monitor your search performance, help troubleshoot issues, and assist with future changes without needing your login credentials. This is the same idea as adding someone to a shared Google Doc.
-
Click
Settingsat the bottom of the left sidebar, then clickUsers and permissions.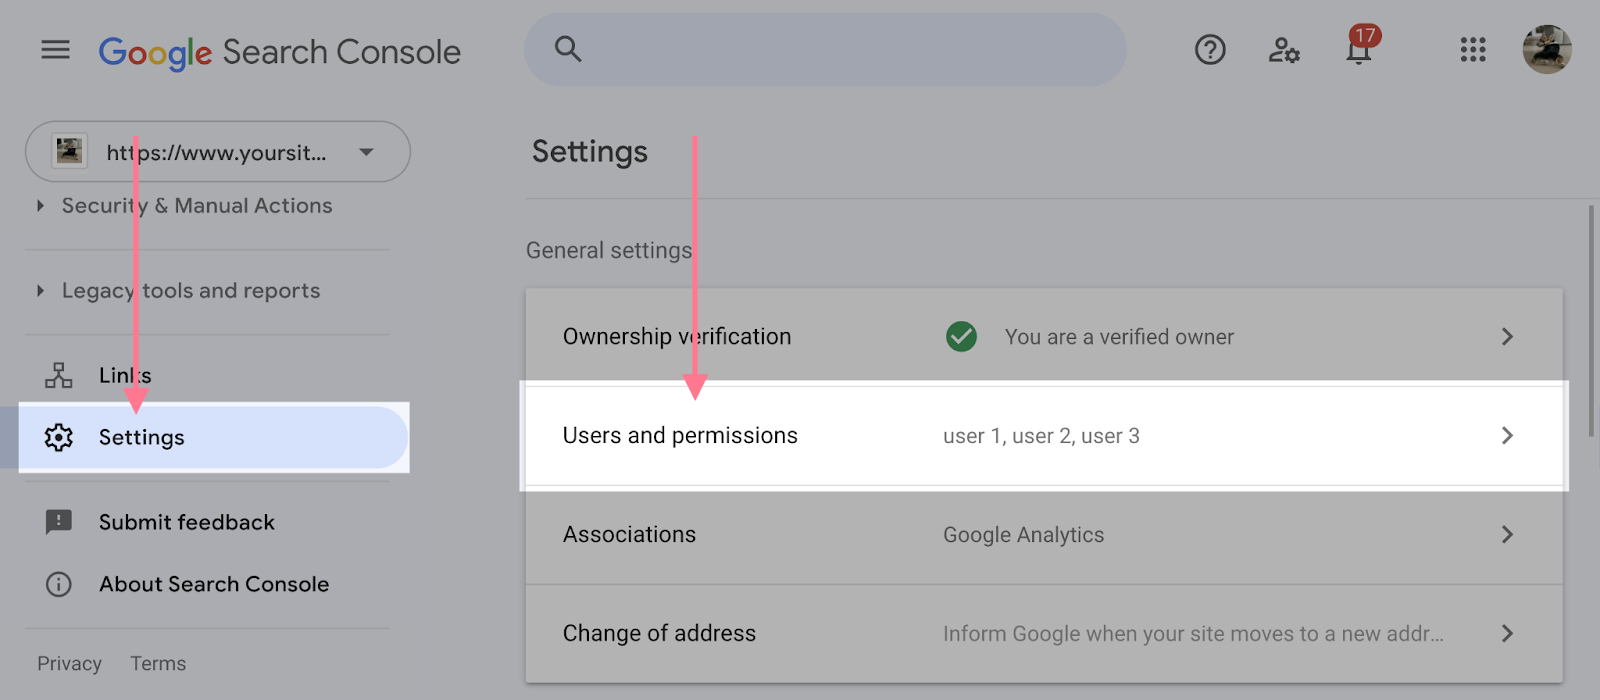
Settings is at the very bottom of the left sidebar. Users and permissions is the first option inside. You can see the current list of users for this property.
-
Click the blue
Add userbutton in the top right.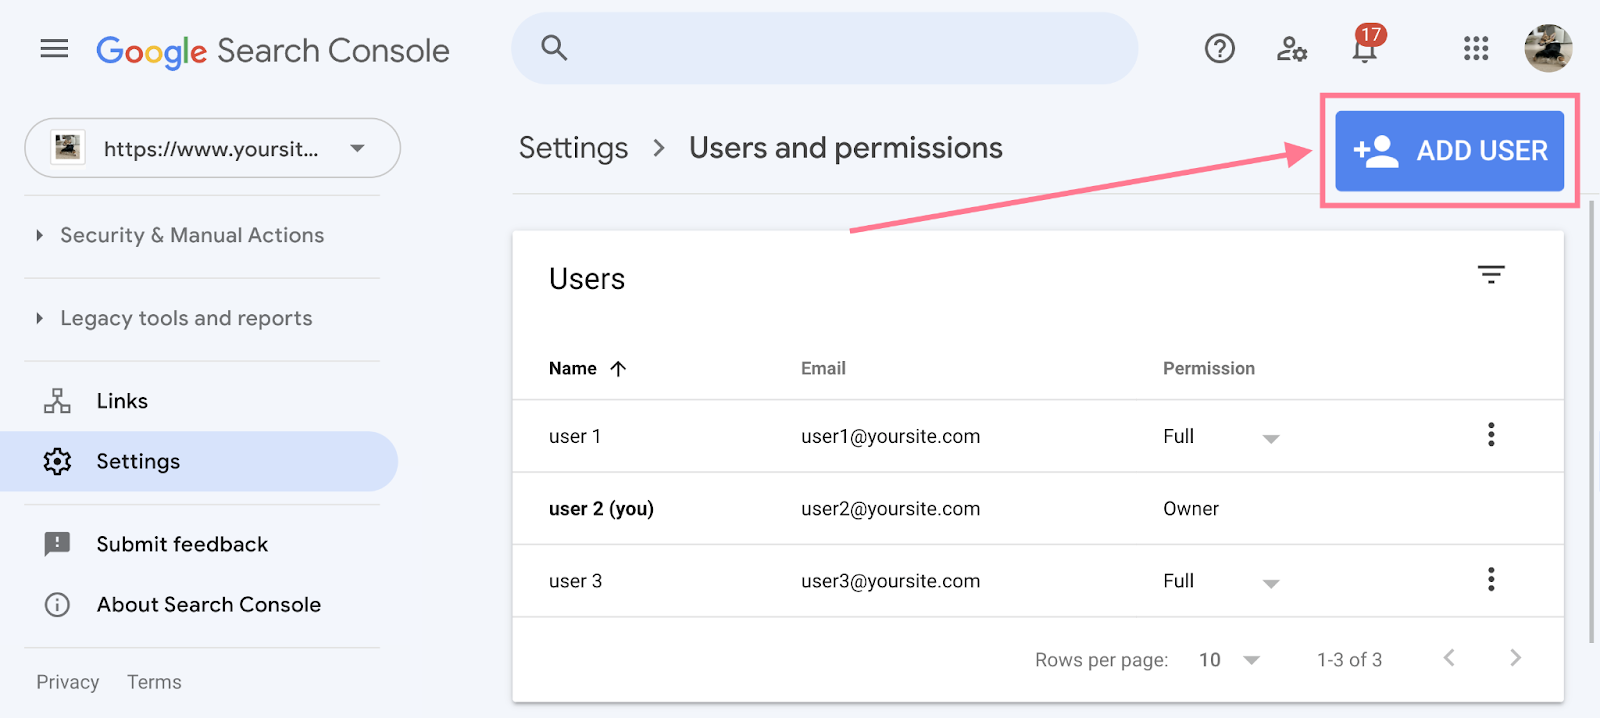
The Add user button opens a small form where you enter the new user's email and permission level. A dialog box opens asking for an email address and permission level.
-
Enter
contact@funkpd.comas the email, set the permission toOwner, and clickAdd.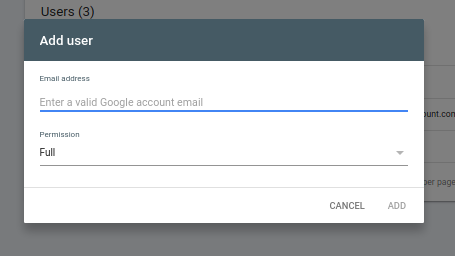
Always use Owner level for Nolan — this gives him the access he needs to fully manage and diagnose your property. Nolan receives an invitation email from Google Search Console. Let him know it is coming.
Permission levels explained — what each one means
| Permission | What they can do | When to use it |
|---|---|---|
| Owner | Everything — full data access, settings, adding and removing other users. | Nolan, or anyone you fully trust to manage the property. |
| Full | Most data and most actions, but cannot manage users. | Someone who needs to work in the tool regularly but should not control access. |
| Restricted | Can view most data but cannot take actions or change settings. | Someone who just needs to see reports — a bookkeeper, a silent partner, etc. |
Setup Complete — Understanding What You Have Now
The four steps above are the actual setup. Everything below is optional reading to help you understand what Google Search Console shows you going forward. You do not need to do anything here right now.
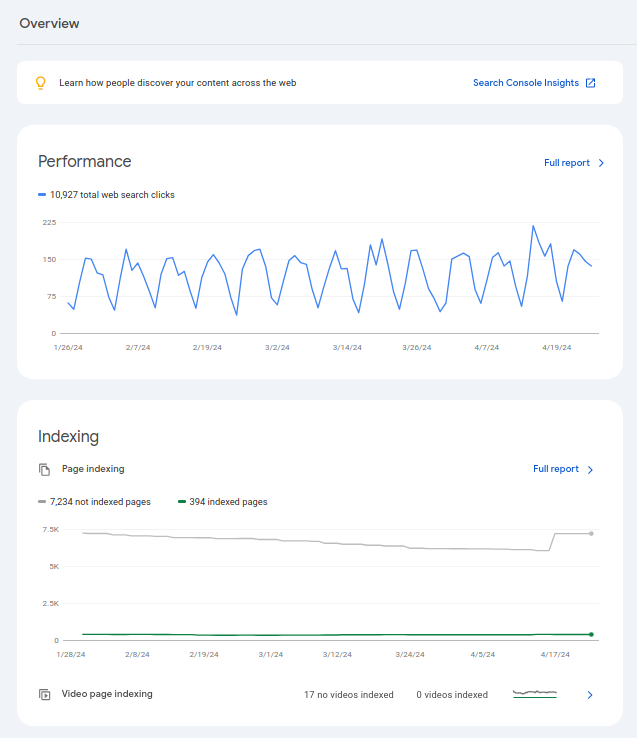
What the Performance report shows you
The Performance report is the main dashboard you will use over time. It shows four key numbers:
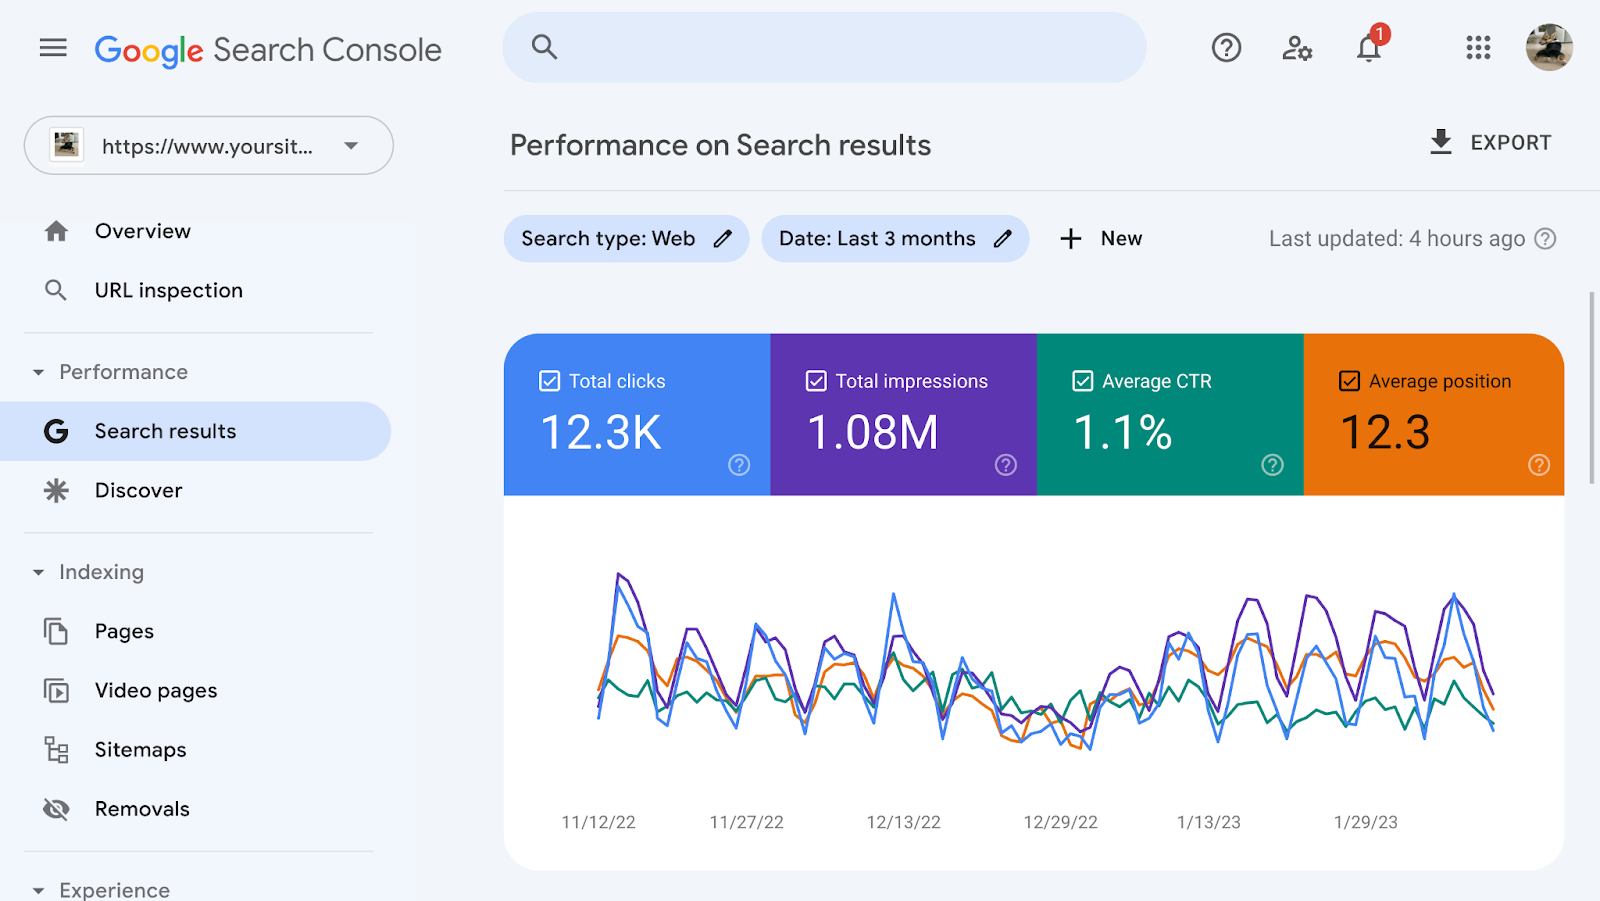
- Clicks — how many times someone actually clicked your site in Google search results.
- Impressions — how many times your site appeared in search results, whether clicked or not.
- CTR (click-through rate) — the percentage of impressions that turned into clicks. Low CTR can mean your page title or description is not compelling.
- Average position — your average rank in search results. Position 1 is the top result. Lower numbers are better.
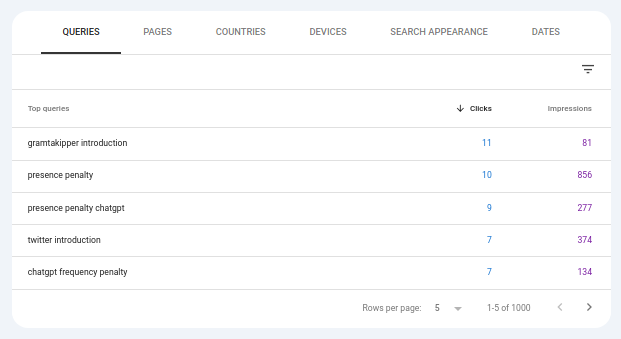
The tabs below the chart — Queries, Pages, Countries, Devices — let you break down the data. The Queries tab is the most useful: it shows you exactly what people searched for before clicking your site.
How to check if your pages are showing up in Google
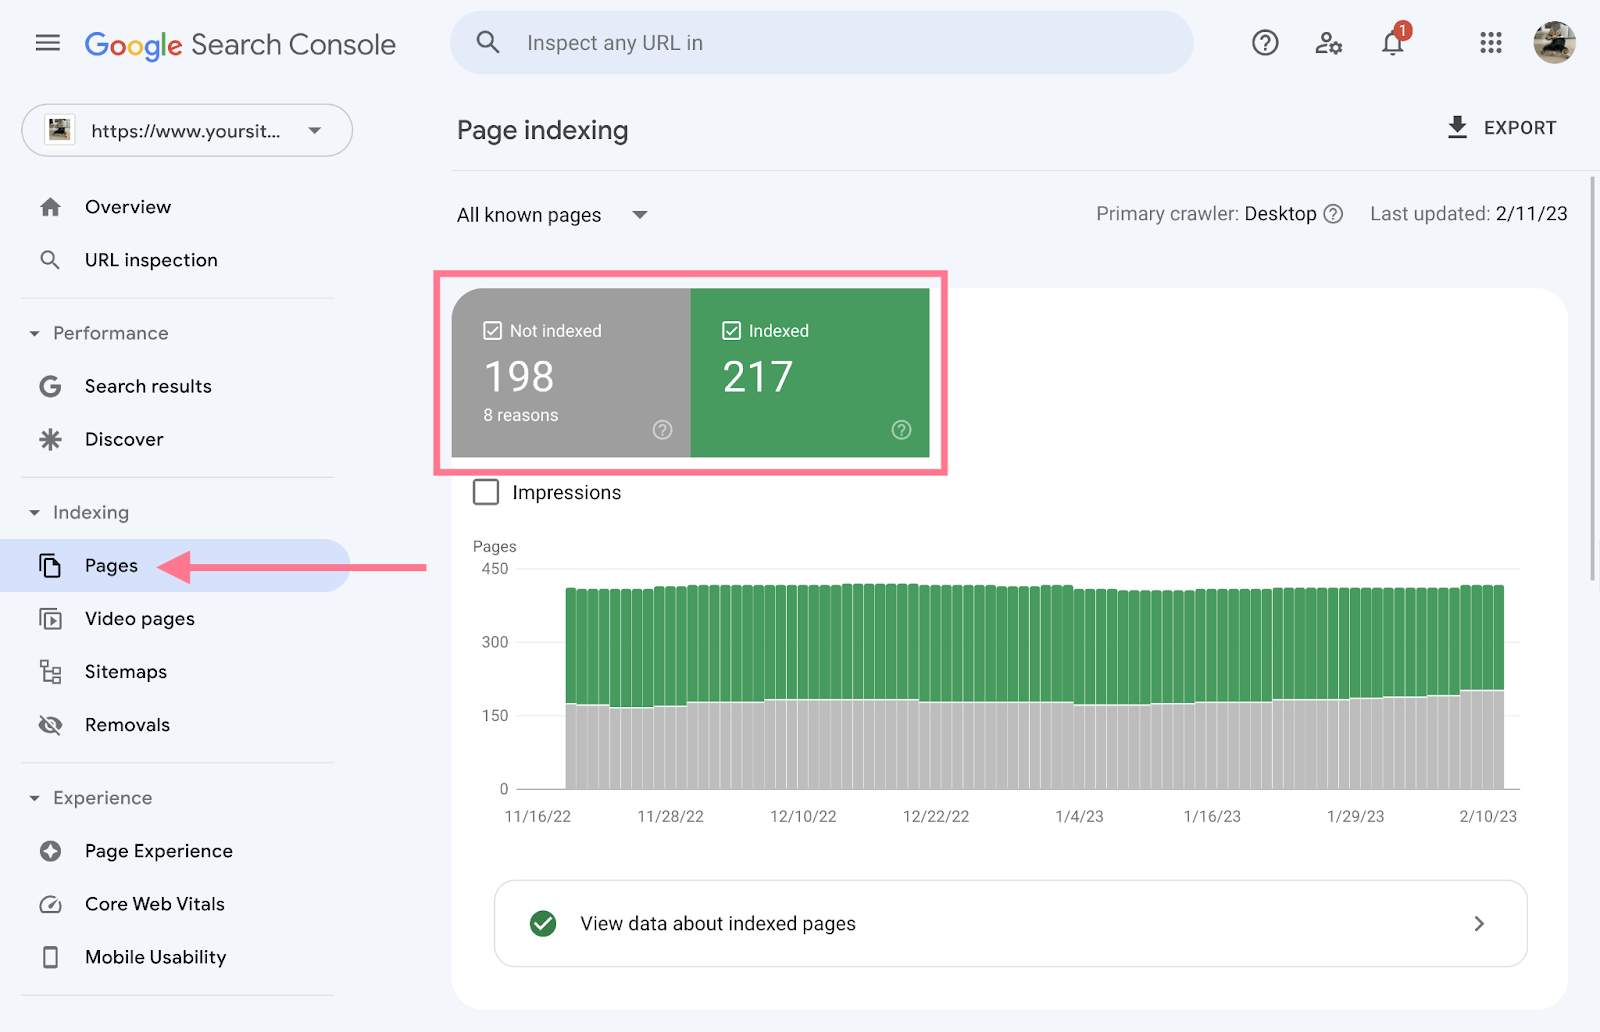
Go to Indexing → Pages in the left sidebar. This shows which pages on your site Google is actively showing in search results and which ones it is skipping.
A small number of "Not indexed" pages is normal — these are often thank-you pages, privacy policies, and other pages you do not necessarily want in search results. If large portions of your site are not indexed, contact Nolan.
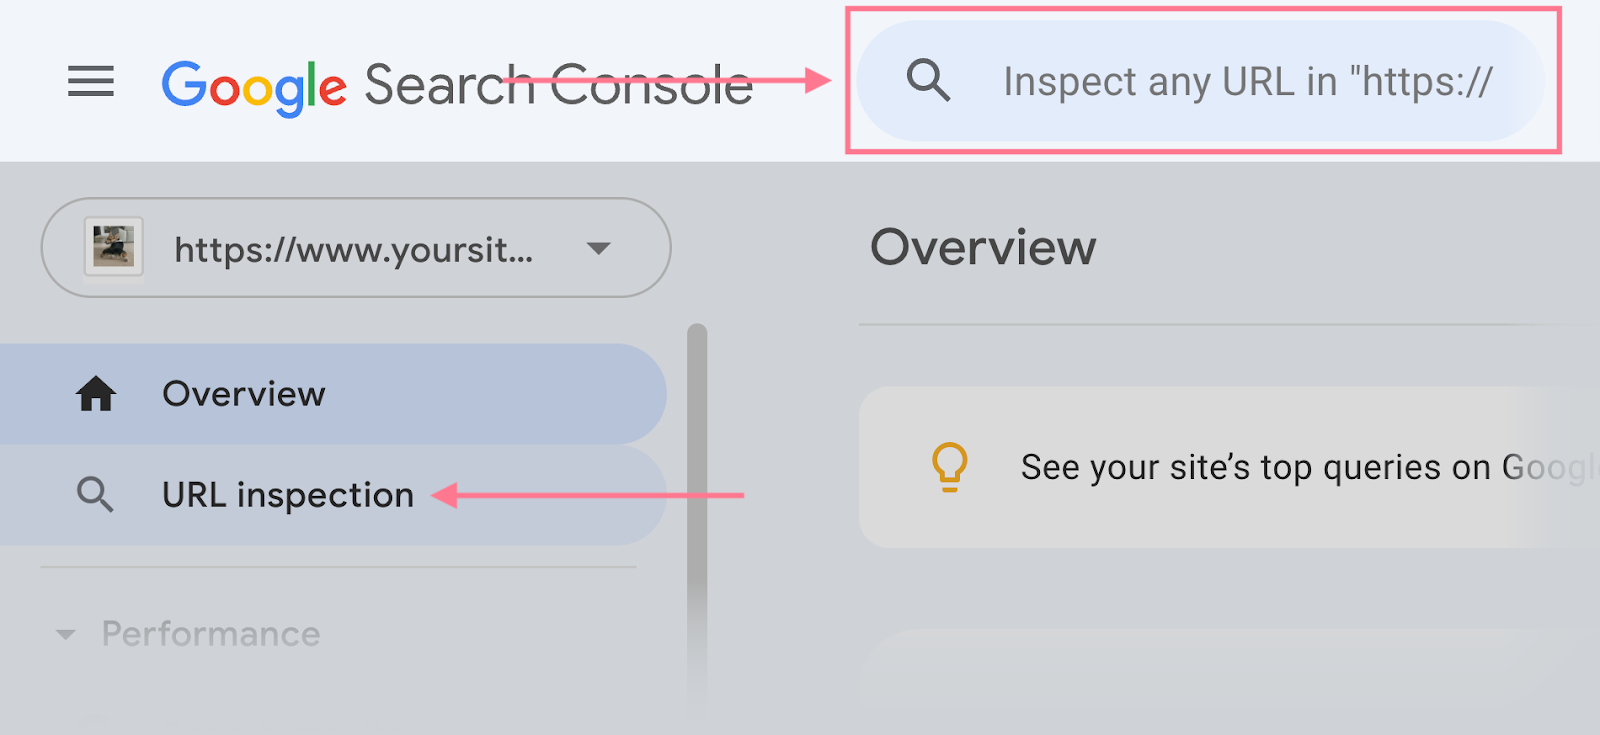
If you publish a new page and want to know whether Google has found it yet, paste the full URL into the search bar at the top of Google Search Console. It will tell you the current status and let you ask Google to re-crawl it.
Google Search Console is now fully set up. Head to the Google Business Profile setup guide now — because you just verified your domain in GSC, the instant verification shortcut will be available to you there. Do not skip it.